Find out how much personal information your Google account stores. Your account has a thorough map of your digital activity from your location data to your search background. This information begs serious privacy issues even if it can improve your online experience. The positive news? Google lets you easily manage and safeguard your data by configuring auto-deletion for your account.
This guide will walk you through the value of auto-deletion and offer a simple, step-by-step approach to set it up. By the end, you will know exactly how to control your personal data and maintain a simplified account.
Why Deletion Matters in Auto-Systems
Understanding the “why” will help us to better enter the “how.” Here are some main arguments in favor of allowing auto-deletion as a wise action:
- Improved Personal Privacy: Eliminating old data automatically lessens the personal information kept online, thereby lessening your vulnerability should a data breach occur.
- Account Without Clutter: Goodbye to pointless data clutter. Auto-deletion guarantees a neat and orderly Google account.
- Keep Control: Defining the lifetime of your data helps you to control what stays and what leaves.
Auto-deletion is a great tool reflecting ethical data management whether your goal is to improve your privacy game or declutter for pragmatic reasons.
Methodical Guide for Establishing Auto-Deletion Systems
Knowing the advantages will help you to start right away! Use these instructions to create auto-deletion for your Google account:
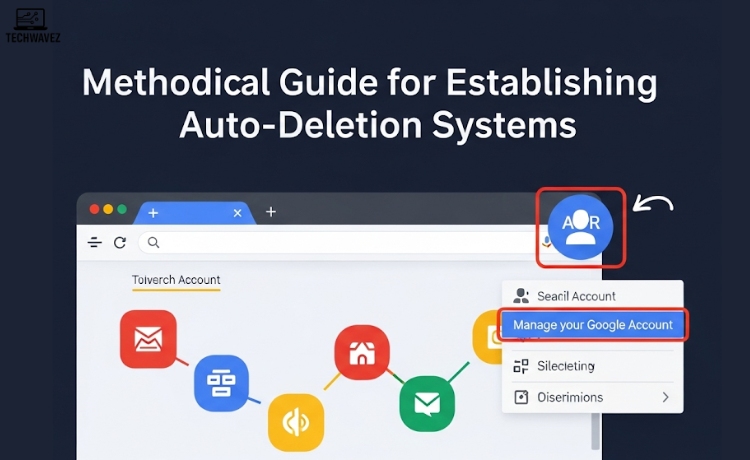
Step 1: Get Google Account Settings
- Sign in with your Google account.
- Click your profile symbol at the top-right corner to choose “Manage your Google Account.”
Step 2: Find Data and Privacy Options
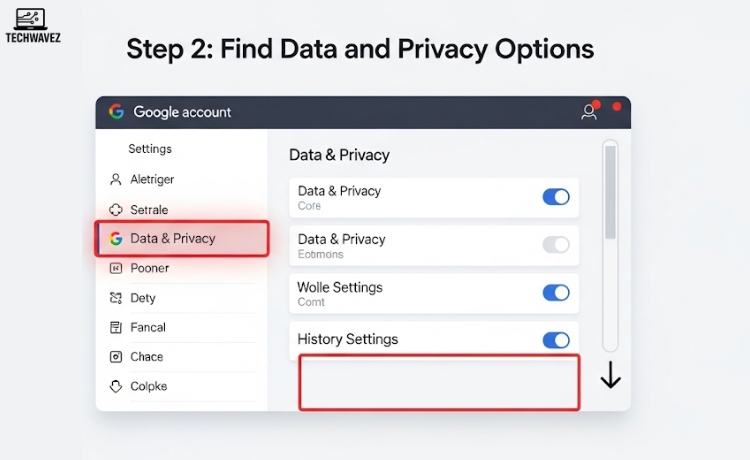
- Choose the “Data & Privacy” tab found in the left-hand sidebar.
- Scroll down to the section headed “History Settings.”
Step 3: Configuring Auto-Deletion
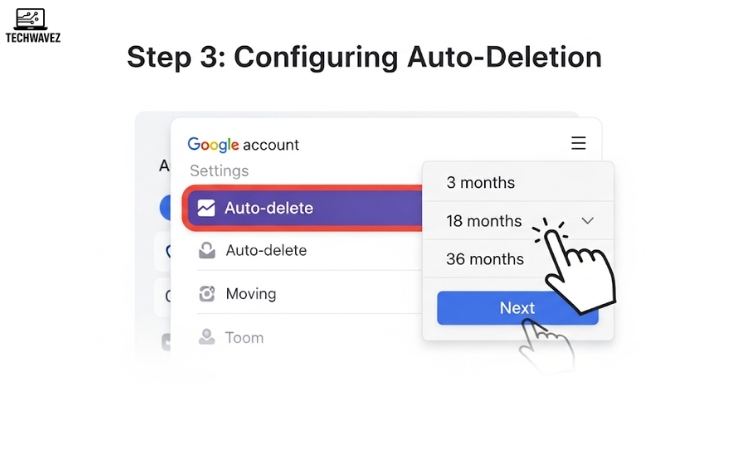
- Search among the activity options for settings like Web & App Activity, Location History, and YouTube History.
- Click “Auto-delete” after selecting one of these choices.
- Google will offer 3 months, 18 months, or 36 months as timeline options. Choose the period that fits you the best.
- Click “Next” to confirm your selection.
Step 4: Personalize Deletion Choices
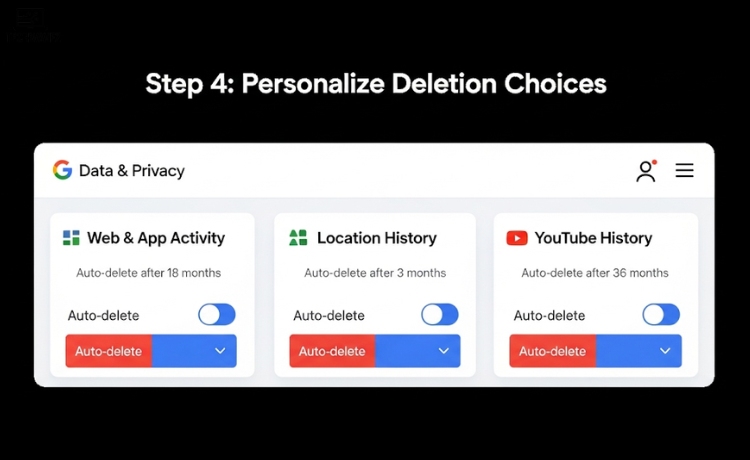
- Go through this for every kind of data activity you want to auto-delete.
- Customize based on your privacy preferences. For example, you might select shorter timeframes for location history.
Official Google Help: Auto-Delete Activity
Advice and Notes of Thought
Here are some key ideas to keep in mind to maximize auto-deletion:
- Select the Appropriate Time Interval
If privacy is your first concern, choose the shortest option—3 months. If you review past data occasionally, the 18-month or 36-month options may be more appropriate. - Back Up Crucial Information
Remember, enabling auto-deletion means old data will be permanently erased. Back up any photos, emails, or important documents you wish to retain. - Review Activity Controls
Google gives you the option to reduce the amount of data it collects. Review your Activity Controls to fine-tune data collection.
Enhanced Options
If auto-deletion settings aren’t enough, Google also provides additional tools for managing specific data types:
- Handling Google Services like Drive & Photos
Auto-deletion doesn’t apply to services like Google Drive or Google Photos. Manually review and remove unused files there.
🔗 Visit Google Drive | Visit Google Photos - Managing YouTube Archive
Whether it’s old searches or videos, visit YouTube History Settings to auto-delete your watch and search history.
Common Issues: Troubleshooting
- Can’t Find Auto-Delete Settings?
Make sure you’re logged in with the correct Google account. Workplace or school accounts may have restrictions. - Deleted the Wrong Data?
Unfortunately, deleted data is not recoverable. Always back up before enabling auto-deletion. - Auto-Deletion Not Working?
Ensure you followed all on-screen prompts and clicked “Next” to save preferences. Recheck settings for each data category.
Organize Your Data Simplistically and Safely
Taking control of your digital privacy doesn’t have to be complicated. Enabling auto-deletion is an excellent step toward cleaner, safer, and more manageable digital living.
Take a moment today to adjust your Google account settings. For more digital tips, explore Techwavez’s full library of smart guides or check out our featured post: The Best CRM Software for Small Businesses in 2025.
Meta Title: Setting Google Auto-Deletion Settings: How to
Meta Description: Find out how to create auto-deletion for your Google account. Steps for maintaining privacy-oriented security and organization of your account!